Build Your Own Offensive Security Lab A Step-by-Step Guide with Ludus

TL;DR:
If you’re looking to set up your own lab for practicing offensive and defensive security techniques, this post is for you. In this guide, I’ll walk you through my experience with Ludus and demonstrate how to build a red team lab using this tool—the simplest and most efficient method I’ve discovered so far. The lab will feature an Active Directory environment (using GOAD) integrated with an XDR/SIEM solution (Wazuh).
Hardware Setup
Ludus provides its own hardware recommendations, which you can find on their Hardware Recommendations.
After some research, I found a cost-effective option that suits my needs, as I didn’t want to overspend on a lab primarily intended for testing purposes. I decided on the Beelink SER5 Pro Mini PC/32GB DDR4/1TB:
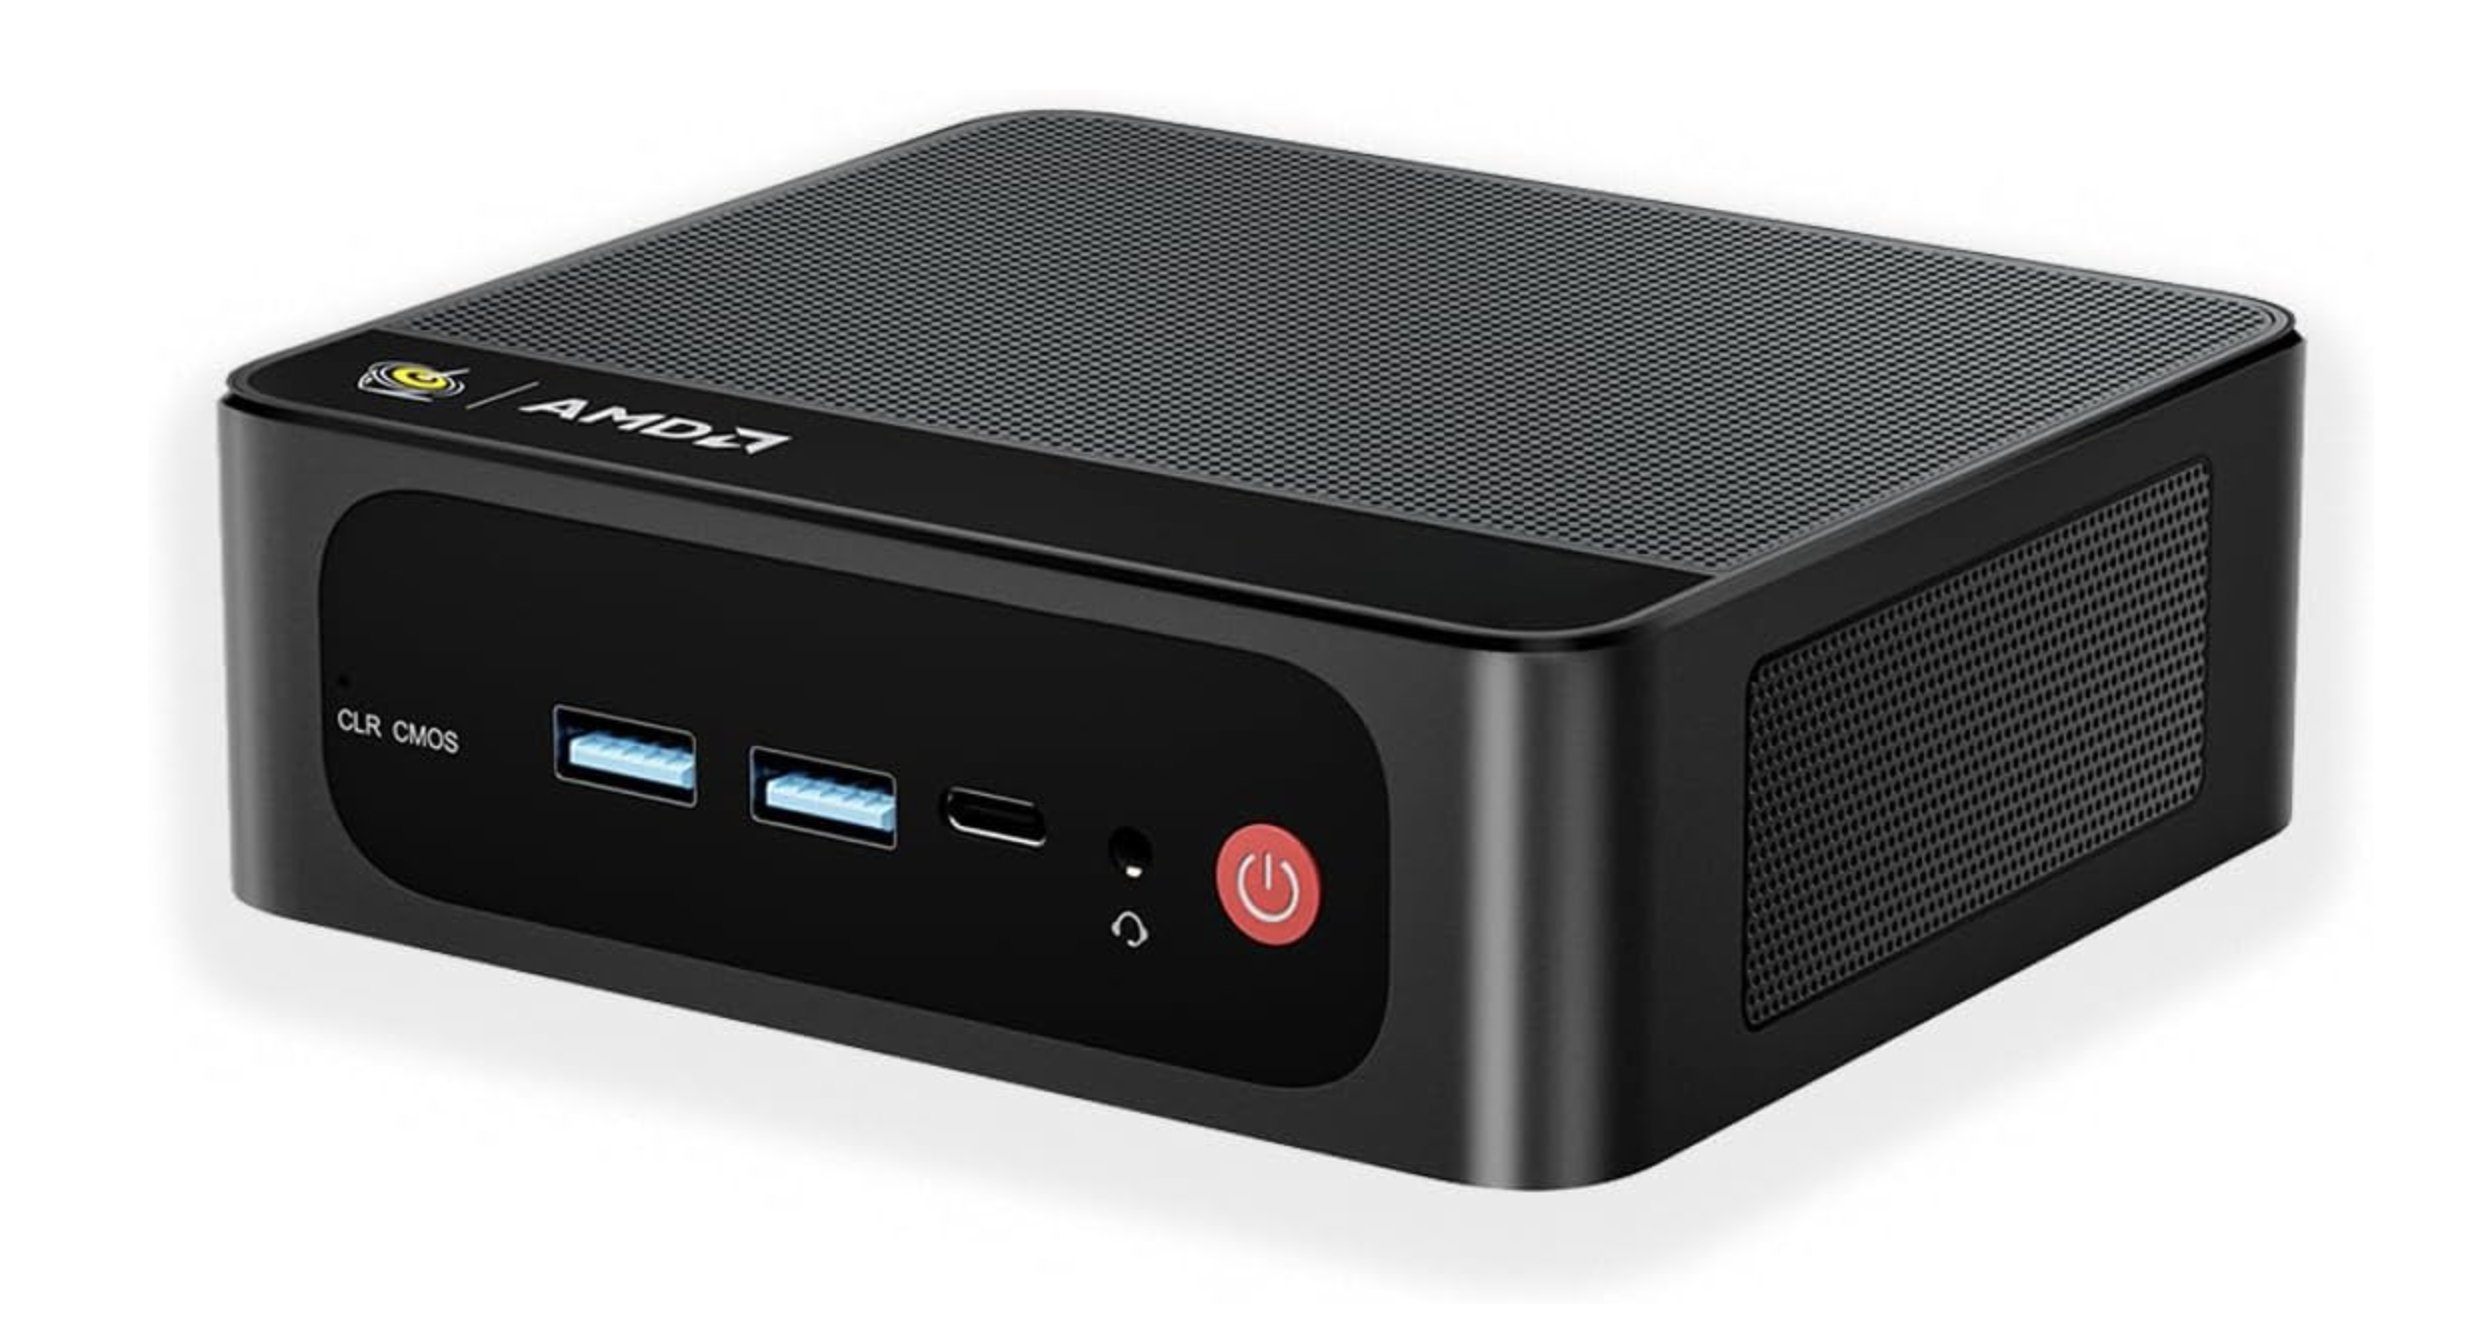
The Hardware specs are:
- AMD Ryzen 7 5700U Processor (8C/16T, 1.8GHz up to 4.3GHz)
- 32GB SO-DIMM DDR4 3200MHz (can upgrade to 64GB)
- 1TB M.2 PCIe3.0 SSD, expandable up to 2TB
- WiFi 6 (802.11ax), Bluetooth 5.2, 1000M LAN
- 1 TB SSD Hard Drive
I selected these specifications based on my specific requirements, but you can adjust the hardware to better align with your own needs and budget. There are plenty of other options available depending on your use case.
Why Ludus?
I’ve always enjoyed experimenting with my own labs, particularly those involving Active Directory environments. However, setting up and maintaining these labs has often been a tedious and time-consuming process. When I discovered Ludus, I was eager to give it a try—and it turned out to be the simplest and most efficient solution I’ve encountered for building and managing a lab.
One of the standout features of Ludus is its support for Templates (pre-configured VM templates) and Ranges (pre-built lab environments). What I particularly appreciate about Ludus is its use of YAML files for configuration. This allows you to:
- Customize your lab environment to suit your needs.
- Share your setup with colleagues or friends effortlessly.
- Use YAML files created by others to replicate their lab environments.
This flexibility and ease of use make Ludus an excellent choice for anyone looking to streamline the process of creating and maintaining a red team lab.
Getting Started with Debian 12
To begin, I installed Debian 12 on my new server, as recommended by the Ludus documentation. The installation process is straightforward, but there’s one key step to keep in mind: enabling the SSH server during setup. This allows you to connect to the server remotely at any time during the setup.
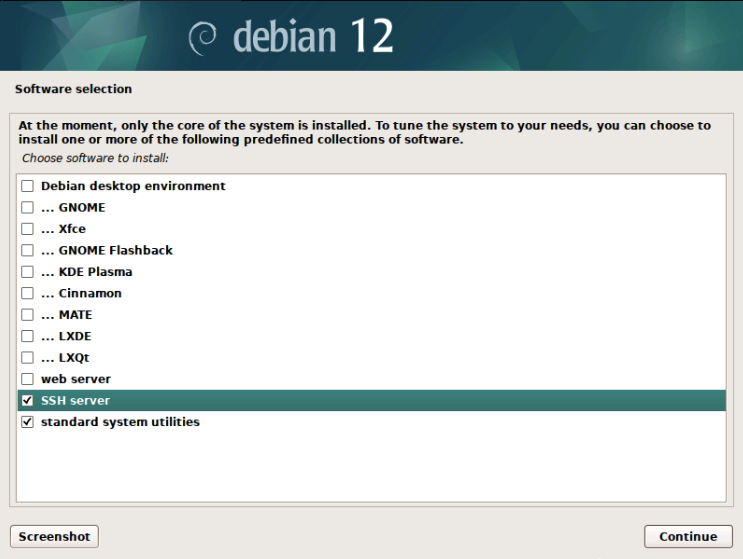
Ensure the installation is performed using an Ethernet connection rather than Wi-Fi. Ludus does not currently support Wi-Fi, and using it during installation may require reconfiguring the network interface afterward, which can be an unnecessary hassle.
If you’re unfamiliar with the Debian installation process, you can follow this detailed tutorial to guide you through each step.
Disable auto-suspend on Debian
If you prefer to keep your server running without automatic suspension, you can disable it with the following command:
1
systemctl mask sleep.target suspend.target hibernate.target hybrid-sleep.target
Installing Ludus
Once Debian is installed, you can proceed with Ludus installation by running the following command with root privileges:
1
curl -s https://ludus.cloud/install | bash
The server will reboot multiple times during the installation process. Please be patient and allow it to complete.
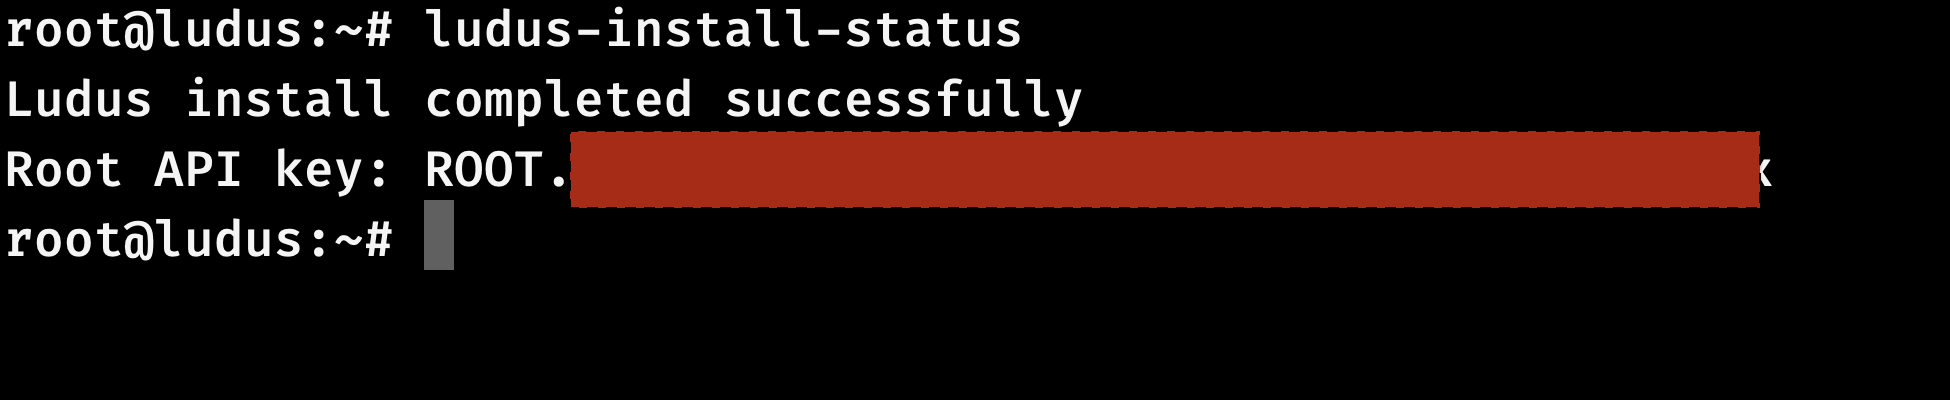
To check the progress of the installation, use the following command:
1
ludus-install-status
Once the installation is complete, you should see a message similar to this:
Creating User
The Ludus API key serves as the root key, allowing you to create new users for managing Proxmox.
To create an admin user for the lab, run the following command
1
2
LUDUS_API_KEY='ROOT.[redacted]' \
 ludus user add --name "Admin User" --userid admin --admin --url https://127.0.0.1:8081
After creating the admin user, you need to export the generated LUDUS_API_KEY to your environment variables:
1
export LUDUS_API_KEY='admin.[redacted]'

This ensures that the Ludus CLI can authenticate requests using the admin user’s API key.
Retrieving Proxmox credentials
Once the installation is complete, you can obtain the Proxmox credentials by running the following command:
1
2
3
4
5
6
root@ludus:~# ludus user creds get
+------------------+----------------------+
| PROXMOX USERNAME |   PROXMOX PASSWORD   |
+------------------+----------------------+
| admin            | [Redacted .........] |
+------------------+----------------------+
Logging into Proxmox
You can access the Proxmox web interface by opening the following URL in your browser: https://LUDUSHOST-IP:8006/

Templates
Templates are pre-configured virtual machines (base VMs) that can be used to deploy your environment. The default list of templates includes:
1
2
3
4
5
6
7
8
9
10
ludus templates list
+------------------------------------+-------+
|              TEMPLATE              | BUILT |
+------------------------------------+-------+
| debian-11-x64-server-template      | FALSE |
| debian-12-x64-server-template      | FALSE |
| kali-x64-desktop-template          | FALSE |
| win11-22h2-x64-enterprise-template | FALSE |
| win2022-server-x64-template        | FALSE |
+------------------------------------+-------+
You can build the templates by running the following command:
1
ludus templates build
To monitor the progress of the build, execute this command to view the logs in real time:
1
ludus templates logs -f

Adding new templates
You can easily add new templates from the Ludus repository. Here’s a list of available templates:
1
2
3
4
5
6
7
8
9
10
11
12
13
14
15
- commando-vm
- debian10
- flare-vm
- remnux
- rocky-8-x64-server
- rocky-9-x64-server
- ubuntu-20.04-x64-server
- ubuntu-22.04-x64-server
- ubuntu-24.04-x64-desktop
- win10-22h2-x64-enterprise
- win11-23h2-x64-enterprise
- win2012r2-server-x64
- win2016-server-x64
- win2019-server-x64
- win2019-server-x64-no-security-updates
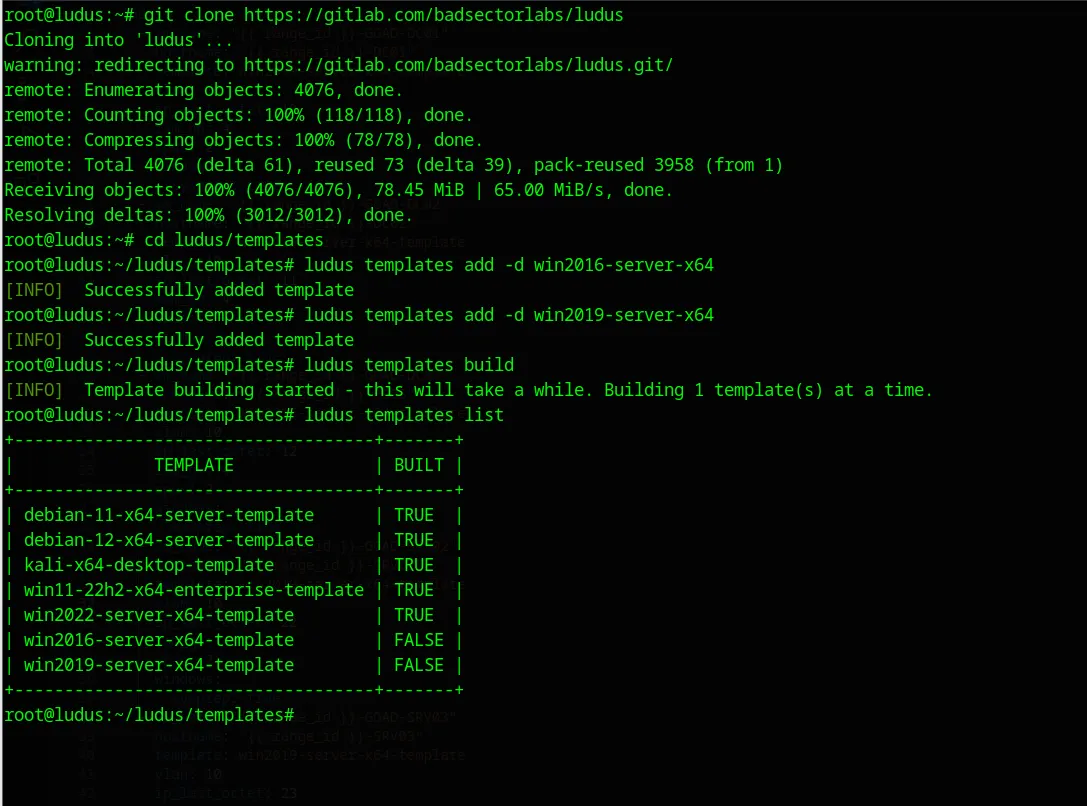
To add a template, first clone the Ludus repository, navigate to the templates directory, and then use the ludus command to add the desired templates:
1
2
3
4
git clone https://gitlab.com/badsectorlabs/ludus
cd ludus/templates
ludus templates add -d win2016-server-x64
ludus templates add -d win2019-server-x64
Full Lab Setup
In this Lab, I would like to make the following:
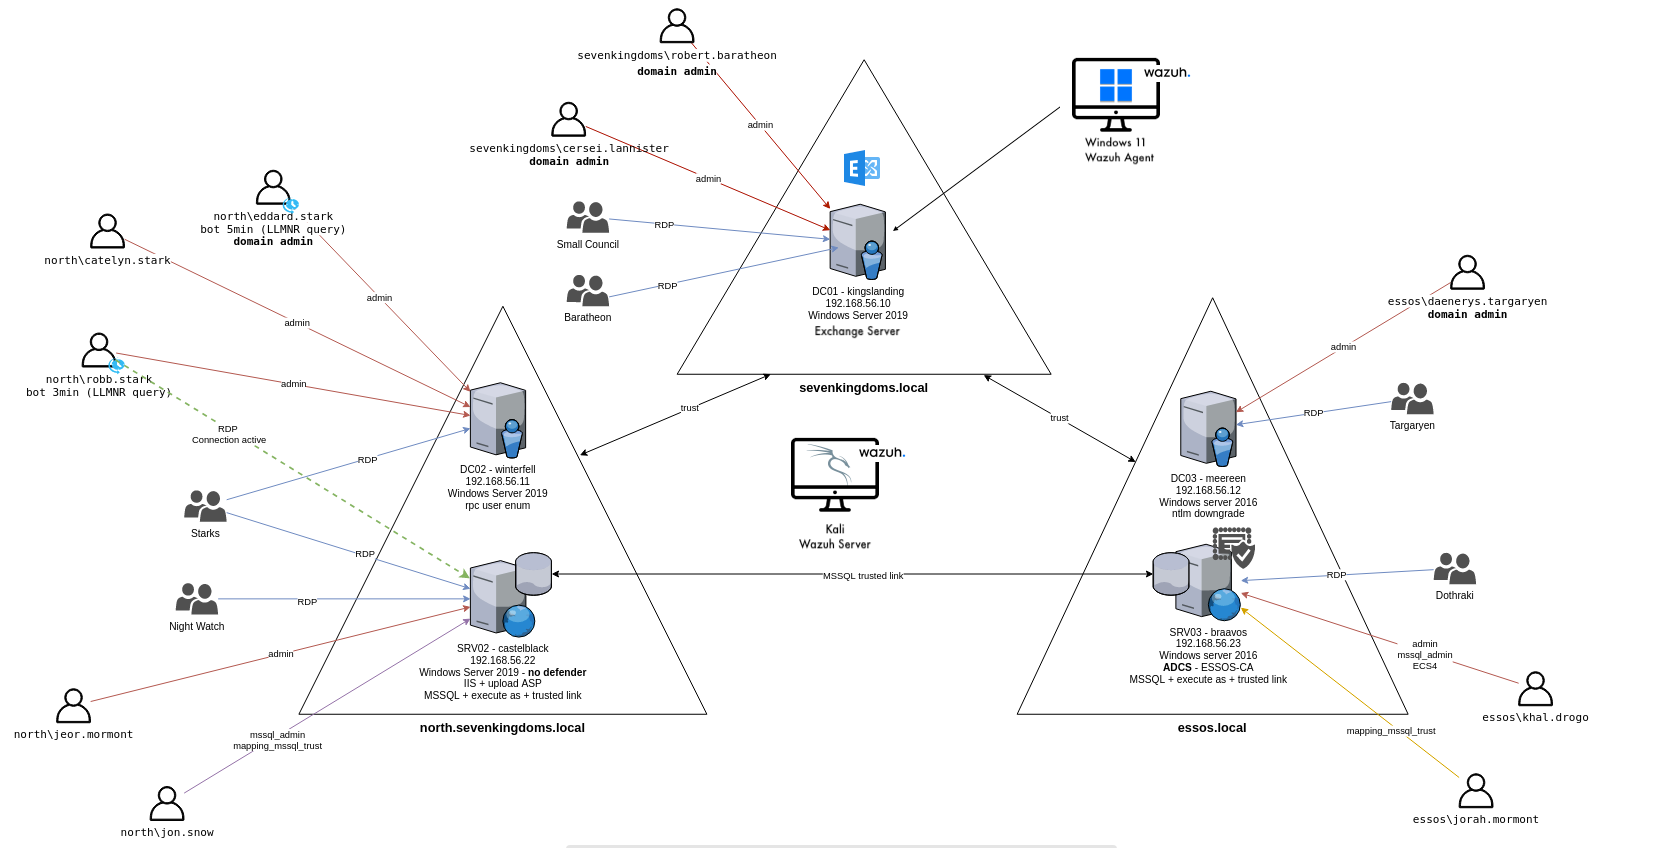
Setup an Active Directory Lab with GOAD (Game of Active Directory)
Setup Exchange Server on DC01 for phishing and email testing
Setup Wazuh XDR/SIEM solution on the evnrionment for testing detections.
Add more machines to the environment
KaliandWindows 11
1. Setup GOAD
Getting Game of Active Directory (GOAD) up and running is a breeze! All you need to do is clone the GOAD repository, choose your favorite environment (GOAD, GOAD-light, or SCCM), hit install, and then… let the waiting begin. Take a deep breath, pour yourself a cup of coffee (or a few), and embrace the art of waiting. Trust me, it’ll be worth it!
1
2
3
4
5
6
7
8
9
git clone https://github.com/Orange-Cyberdefense/GOAD.git
cd GOAD
sudo apt install python3.11-venv
export LUDUS_API_KEY='myapikey'  # you can export it by default on your bashrc or zshrc
./goad.sh -p ludus
GOAD/ludus/local > check
GOAD/ludus/local > set_lab GOAD # GOAD/GOAD-Light/NHA/SCCM
GOAD/ludus/local > install
It should look something like this after a successful install:
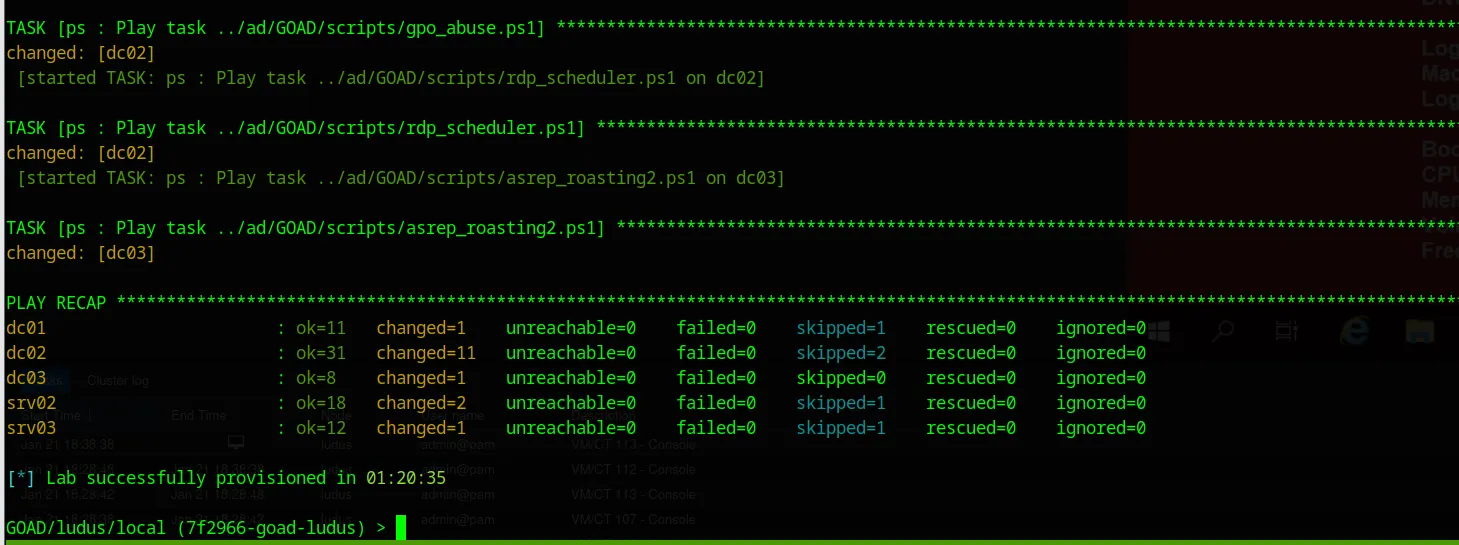 A successful installation of GOAD
This installation will set up an environment consisting of:
- DC01
- DC02
- DC03
- SRV02
- SRV03
with variety of attacks that can be carried out on this environment.
It’s also worth noting that during the installation, GOAD will create a user with a random ID. This is important when running future commands on the Ludus host, as you will need to reference the user ID for modifications or other options.
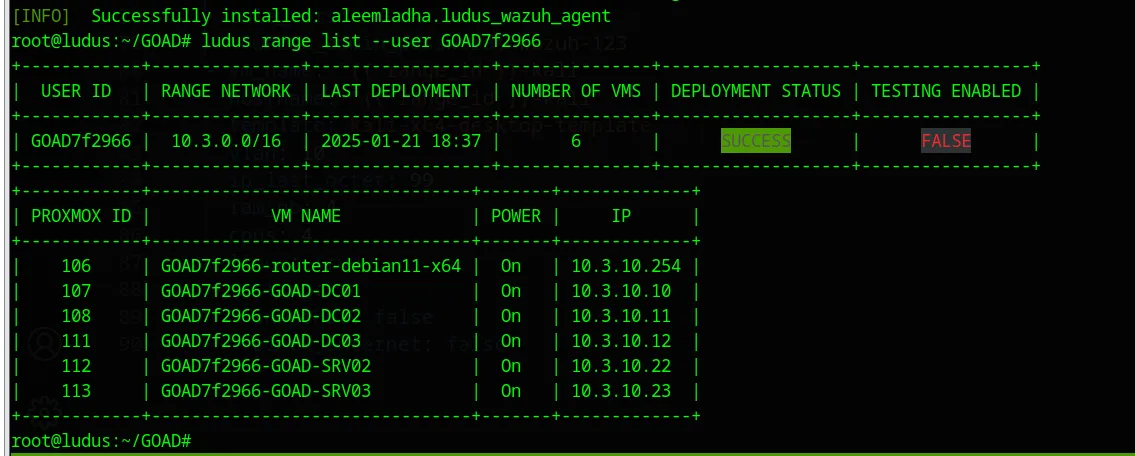 In this case the user id is:
 GOAD7f2966
2. Modifications on the deployed Range
Now that you have successfully deployed a range using GOAD, you may want to add additional options, such as Microsoft Exchange, Wazuh Server, or anything else. How can this be done?
It’s actually quite simple! Since GOAD has already deployed the range with the user ID GOAD7f2966, you can easily load the configuration file of this range and modify it for future use. Just run the following command:
1
ludus --user GOAD7f2966 range config get > basic-config.yml
This will export the current configuration into a file (basic-config.yml) that you can then modify as needed.
Now you can perform the modifications on the basic-config.yml
The Configuration file should look like this:
1
2
3
4
5
6
7
8
9
10
11
12
13
14
15
16
17
18
19
20
21
22
23
24
25
26
27
28
29
30
31
32
33
34
35
36
37
38
39
40
41
42
43
44
45
46
47
ludus:
  - vm_name: "{{ range_id }}-GOAD-DC01"
    hostname: "{{ range_id }}-DC01"
    template: win2019-server-x64-template
    vlan: 10
    ip_last_octet: 10
    ram_gb: 5
    cpus: 2
    windows:
      sysprep: true
  - vm_name: "{{ range_id }}-GOAD-DC02"
    hostname: "{{ range_id }}-DC02"
    template: win2019-server-x64-template
    vlan: 10
    ip_last_octet: 11
    ram_gb: 4
    cpus: 2
    windows:
      sysprep: true
  - vm_name: "{{ range_id }}-GOAD-DC03"
    hostname: "{{ range_id }}-DC03"
    template: win2016-server-x64-template
    vlan: 10
    ip_last_octet: 12
    ram_gb: 4
    cpus: 2
    windows:
      sysprep: true
  - vm_name: "{{ range_id }}-GOAD-SRV02"
    hostname: "{{ range_id }}-SRV02"
    template: win2019-server-x64-template
    vlan: 10
    ip_last_octet: 22
    ram_gb: 4
    cpus: 2
    windows:
      sysprep: true
  - vm_name: "{{ range_id }}-GOAD-SRV03"
    hostname: "{{ range_id }}-SRV03"
    template: win2019-server-x64-template
    vlan: 10
    ip_last_octet: 23
    ram_gb: 4
    cpus: 2
    windows:
      sysprep: true
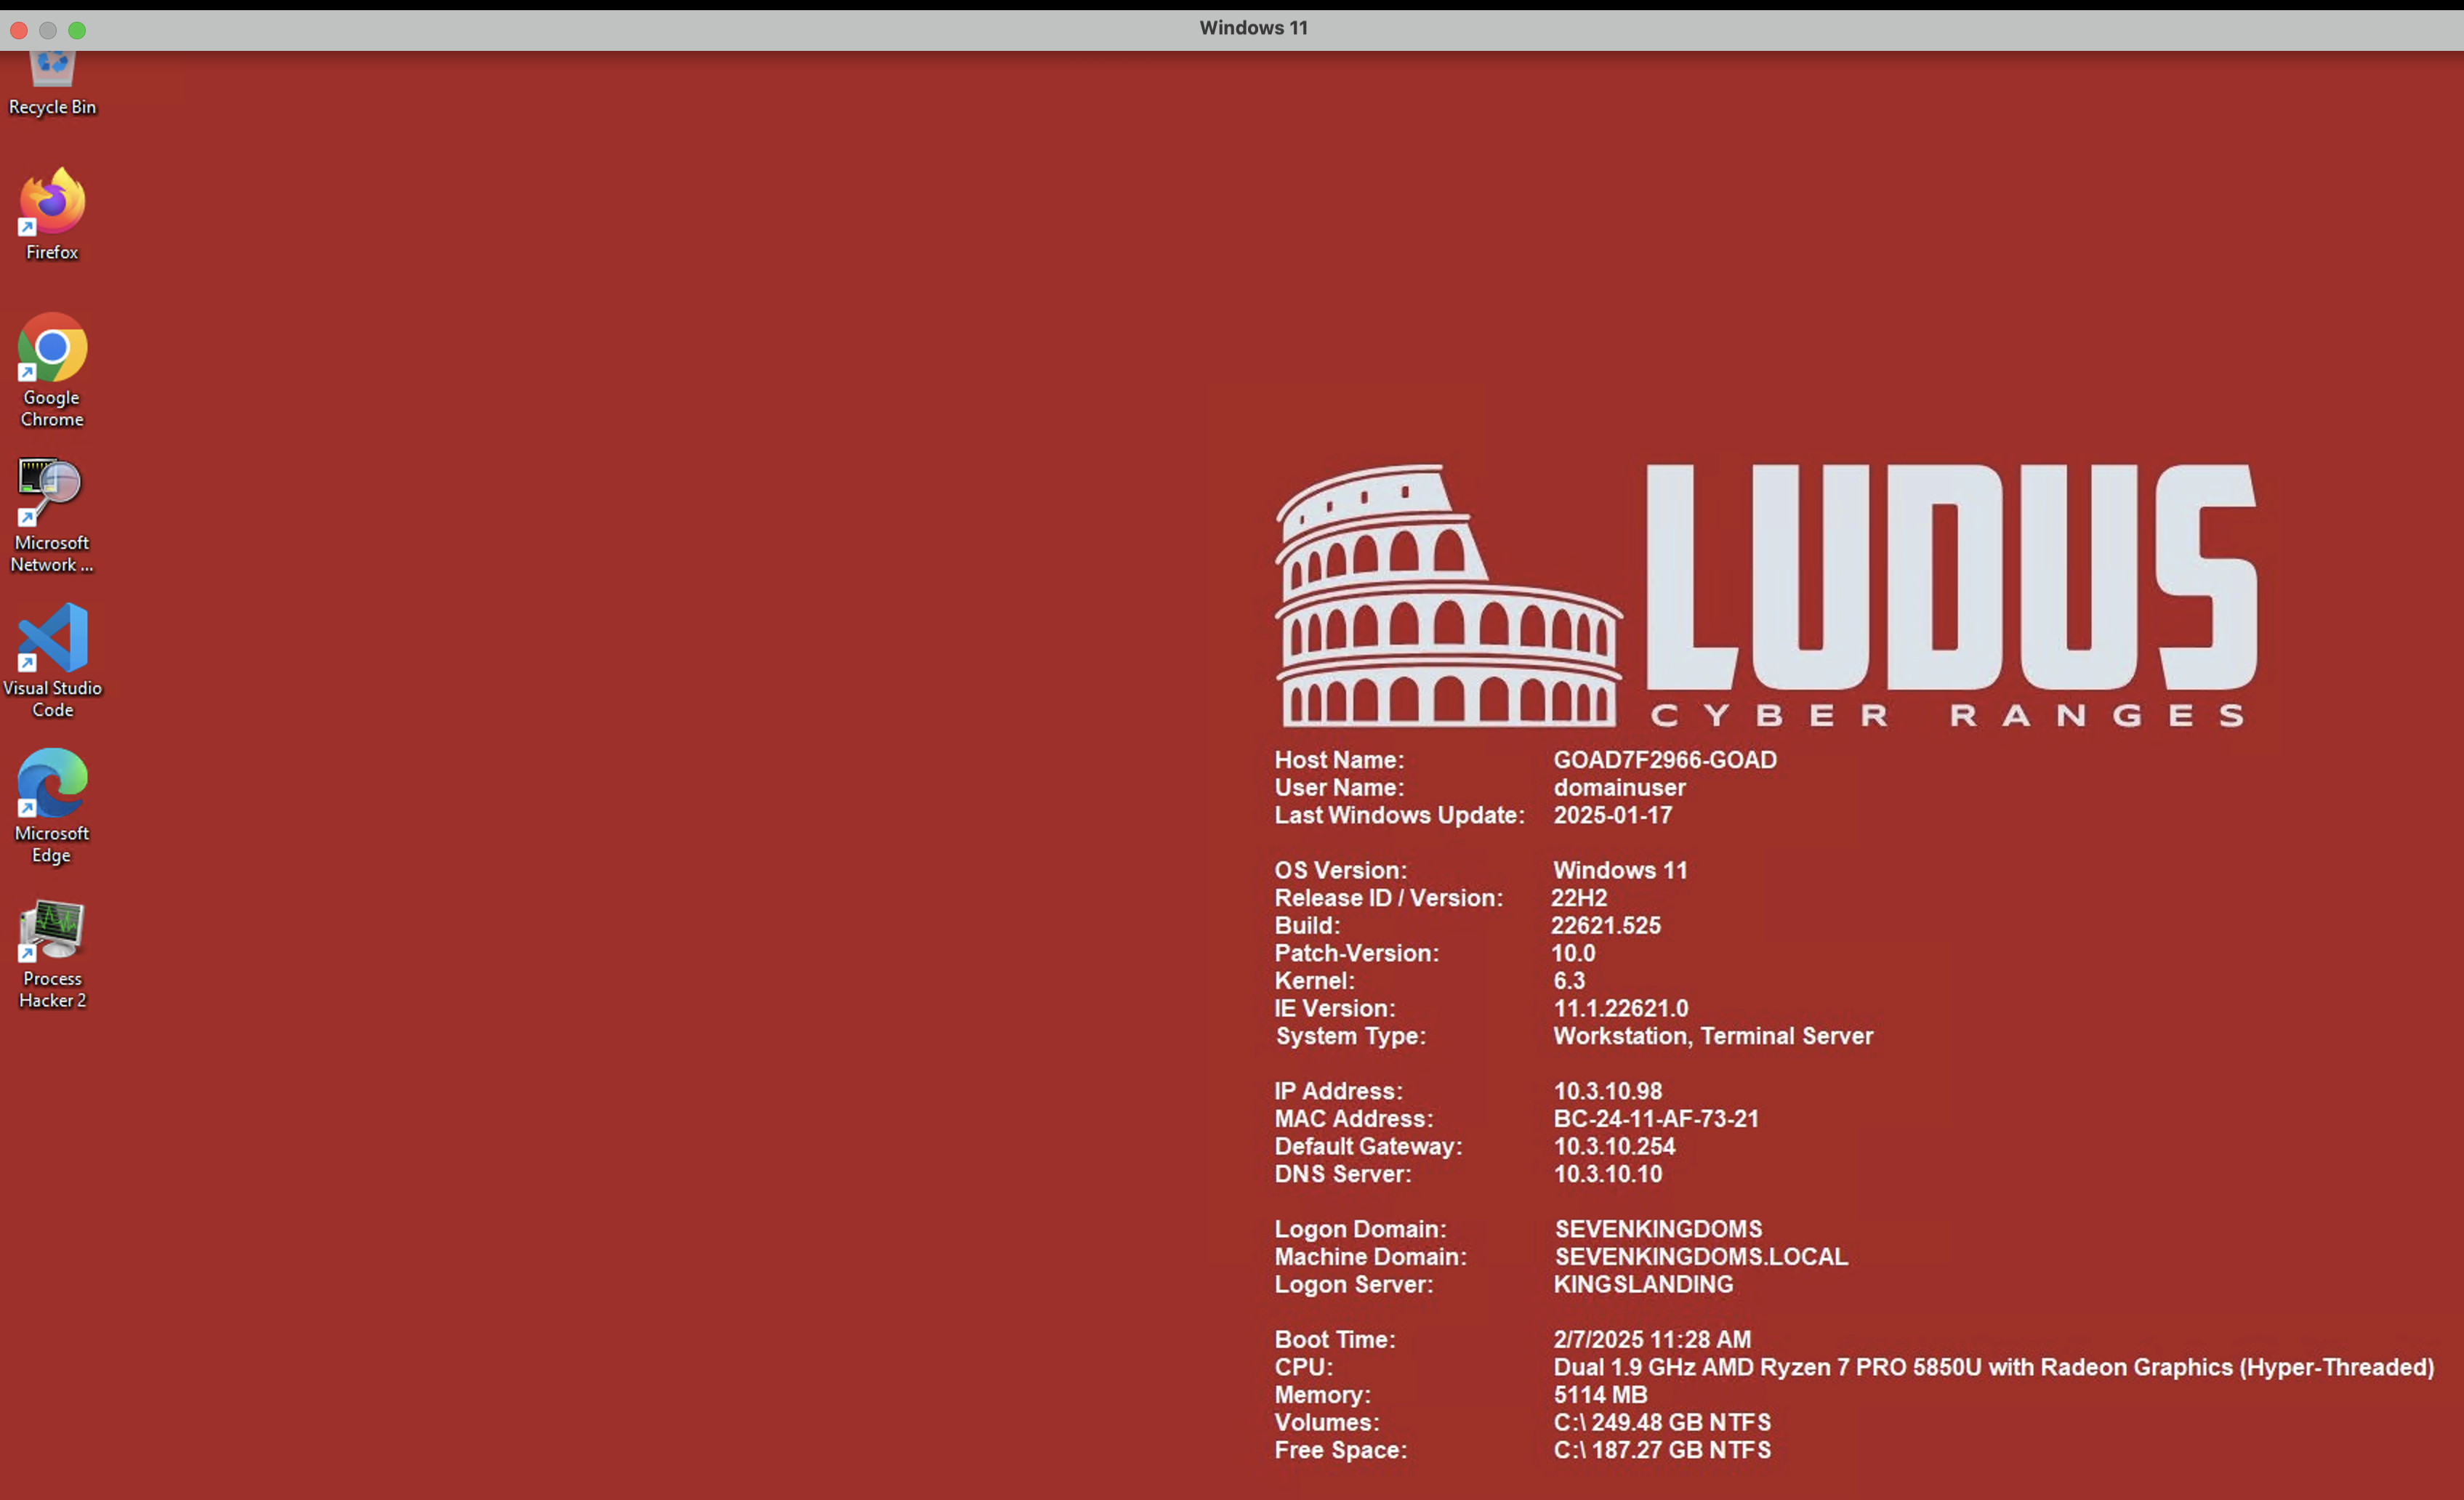
3. Add Domain-Joined Windows 11 machine
I decided to take a more cautious, step-by-step approach instead of making all the modifications at once to avoid potential errors :)
Now, we want to add a new VM—specifically a Windows 11 machine—and make it domain-joined to the SEVENKINGDOMS.local domain, which is hosted on DC01.
We’ll make the following modifications, beginning with adding the VM to the YAML file as shown below:
1
2
3
4
5
6
7
8
9
10
11
12
13
14
15
16
17
18
  - vm_name: "{{ range_id }}-GOAD-Win11"
    hostname: "{{ range_id }}-GOAD-Win11"
    template: win11-22h2-x64-enterprise-template
    vlan: 10
    ip_last_octet: 98
    ram_gb: 5
    cpus: 4
    linux: true
    windows:
      install_additional_tools: true
      office_version: 2019
      office_arch: 64bit
    domain:
        fqdn: sevenkingdoms.local
        role: member
    testing:
      snapshot: false
      block_internet: false
I chose to add the additional tools, which include many useful ones like Google Chrome, Process Hacker, VS Code, and many more.
However, trying to deploy this machine right away will result in an error. After looking into it for a bit, I realized that we need to assign the role of primary-dc to DC01 to get it working and allow the machine to join the domain successfully.
1
2
3
4
5
6
7
8
9
10
11
12
- vm_name: "{{ range_id }}-GOAD-DC01"
    hostname: "{{ range_id }}-DC01"
    template: win2019-server-x64-template
    vlan: 10
    ip_last_octet: 10
    ram_gb: 5
    cpus: 2
    windows:
      sysprep: true
    domain:
      fqdn: sevenkingdoms.local
      role: primary-dc
Now, you can simply deploy the VM by executing the following command:
1.We set the configuration file after modifications
1
ludus range --user GOAD7f2966 config set -f basic-config.yml
2.Deploy the VMs
1
ludus --user GOAD7f2966 range deploy -t vm-only
3.Check the logs if succeeded
1
ludus --user GOAD7f2966 logs -f
4.Deploy the range with limitation of the Windows machine
1
ludus --user GOAD7f2966 range deploy --limit localhost,GOAD7f2966-GOAD-Win11
It is important to always use localhost when deploying with the
--limitoption. This is how Ludus works, as suggested in the Ludus documentation..
4. Add Kali machine for attacks
Let’s add an additional machine, which will be a Kali machine. First, make sure that the Kali template is built successfully by listing the templates:
1
2
3
4
5
6
7
8
9
10
11
12
13
14
root@ludus:~# ludus templates list --user GOAD7f2966
+------------------------------------+-------+
|              TEMPLATE              | BUILT |
+------------------------------------+-------+
| debian-11-x64-server-template      | TRUE  |
| debian-12-x64-server-template      | TRUE  |
| kali-x64-desktop-template          | TRUE  |
| win11-22h2-x64-enterprise-template | TRUE  |
| win2022-server-x64-template        | TRUE  |
| ubuntu-22.04-x64-server-template   | TRUE  |
| win2016-server-x64-template        | TRUE  |
| win2019-server-x64-template        | TRUE  |
| ubuntu-20.04-x64-server-template   | TRUE  |
+------------------------------------+-------+
If the Kali template shows as TRUE, then we’re good to go ahead and add the Kali machine to our range configuration:
1
2
3
4
5
6
7
8
9
10
11
- vm_name: "{{ range_id }}-kali"
    hostname: "{{ range_id }}-kali"
    template: kali-x64-desktop-template
    vlan: 10
    ip_last_octet: 99
    ram_gb: 4
    cpus: 4
    linux: true
    testing:
      snapshot: false
      block_internet: false
We’ll follow the same steps as we did for the Windows machine in the previous section.
5. Setup Exchange
Ludus Roles:
One of the best features I found with Ludus is that you can install basic additions using the Ansible roles. There are many roles already available with Ludus, and you can explore them on this page: Ludus Roles.
The most commonly used roles I’ve found are ADCS, Exchange, and Elastic. Feel free to experiment with other roles as well!
How the roles work?
It’s simple! If you’d like to add a pre-defined role, you can do so with this command:
1
ludus ansible role add [Role_name] --user [USERID]
Once you’ve added the predefined role, you need to specify two things in the YAML configuration on the machine where you’d like to add the role: roles and role_vars.
roles: This is the Ansible role you want to add.role_vars: These are the variables that will be passed to the role, containing the specific configuration for that role.Lets setup the exchange role
Now, I’ve chosen to set up the
exchangerole onDC01and test email delivery and phishing. Following the previous steps, I will do the following:
- Add the new role to the Ludus user
1
ludus ansible role add aleemladha.ludus_exchange --user GOAD7f2966 - Add the role and its variables to the DC01 to make it an exchange server:
1
2
3
4
5
6
7
8
9
10
11
12
13
14
15
ludus:
  - vm_name: "{{ range_id }}-GOAD-DC01"
    hostname: "{{ range_id }}-DC01"
    template: win2019-server-x64-template
    vlan: 10
    ip_last_octet: 10
    ram_gb: 5
    cpus: 2
    windows:
      sysprep: true
    domain:
      fqdn: sevenkingdoms.local
      role: primary-dc
    roles:
      - aleemladha.ludus_exchange
3.Now that everything is configured, we need to deploy the range with the new role. To avoid messing up the deployment, use these options: LIMIT and User defined roles Option
1
ludus --user GOAD7f2966 range deploy -t user-defined-roles --limit localhost,GOAD7f2966-GOAD-DC01
Sometimes, the command above doesn’t work for some reason. If that happens to you, try using the
--only-roles aleemladha.ludus_exchangeoption instead. This will deploy the range based only on the specific role.
Note: After every change you make, you need to load the new configuration file again by running: ludus range config set -f config.yml --user GOAD7f2966
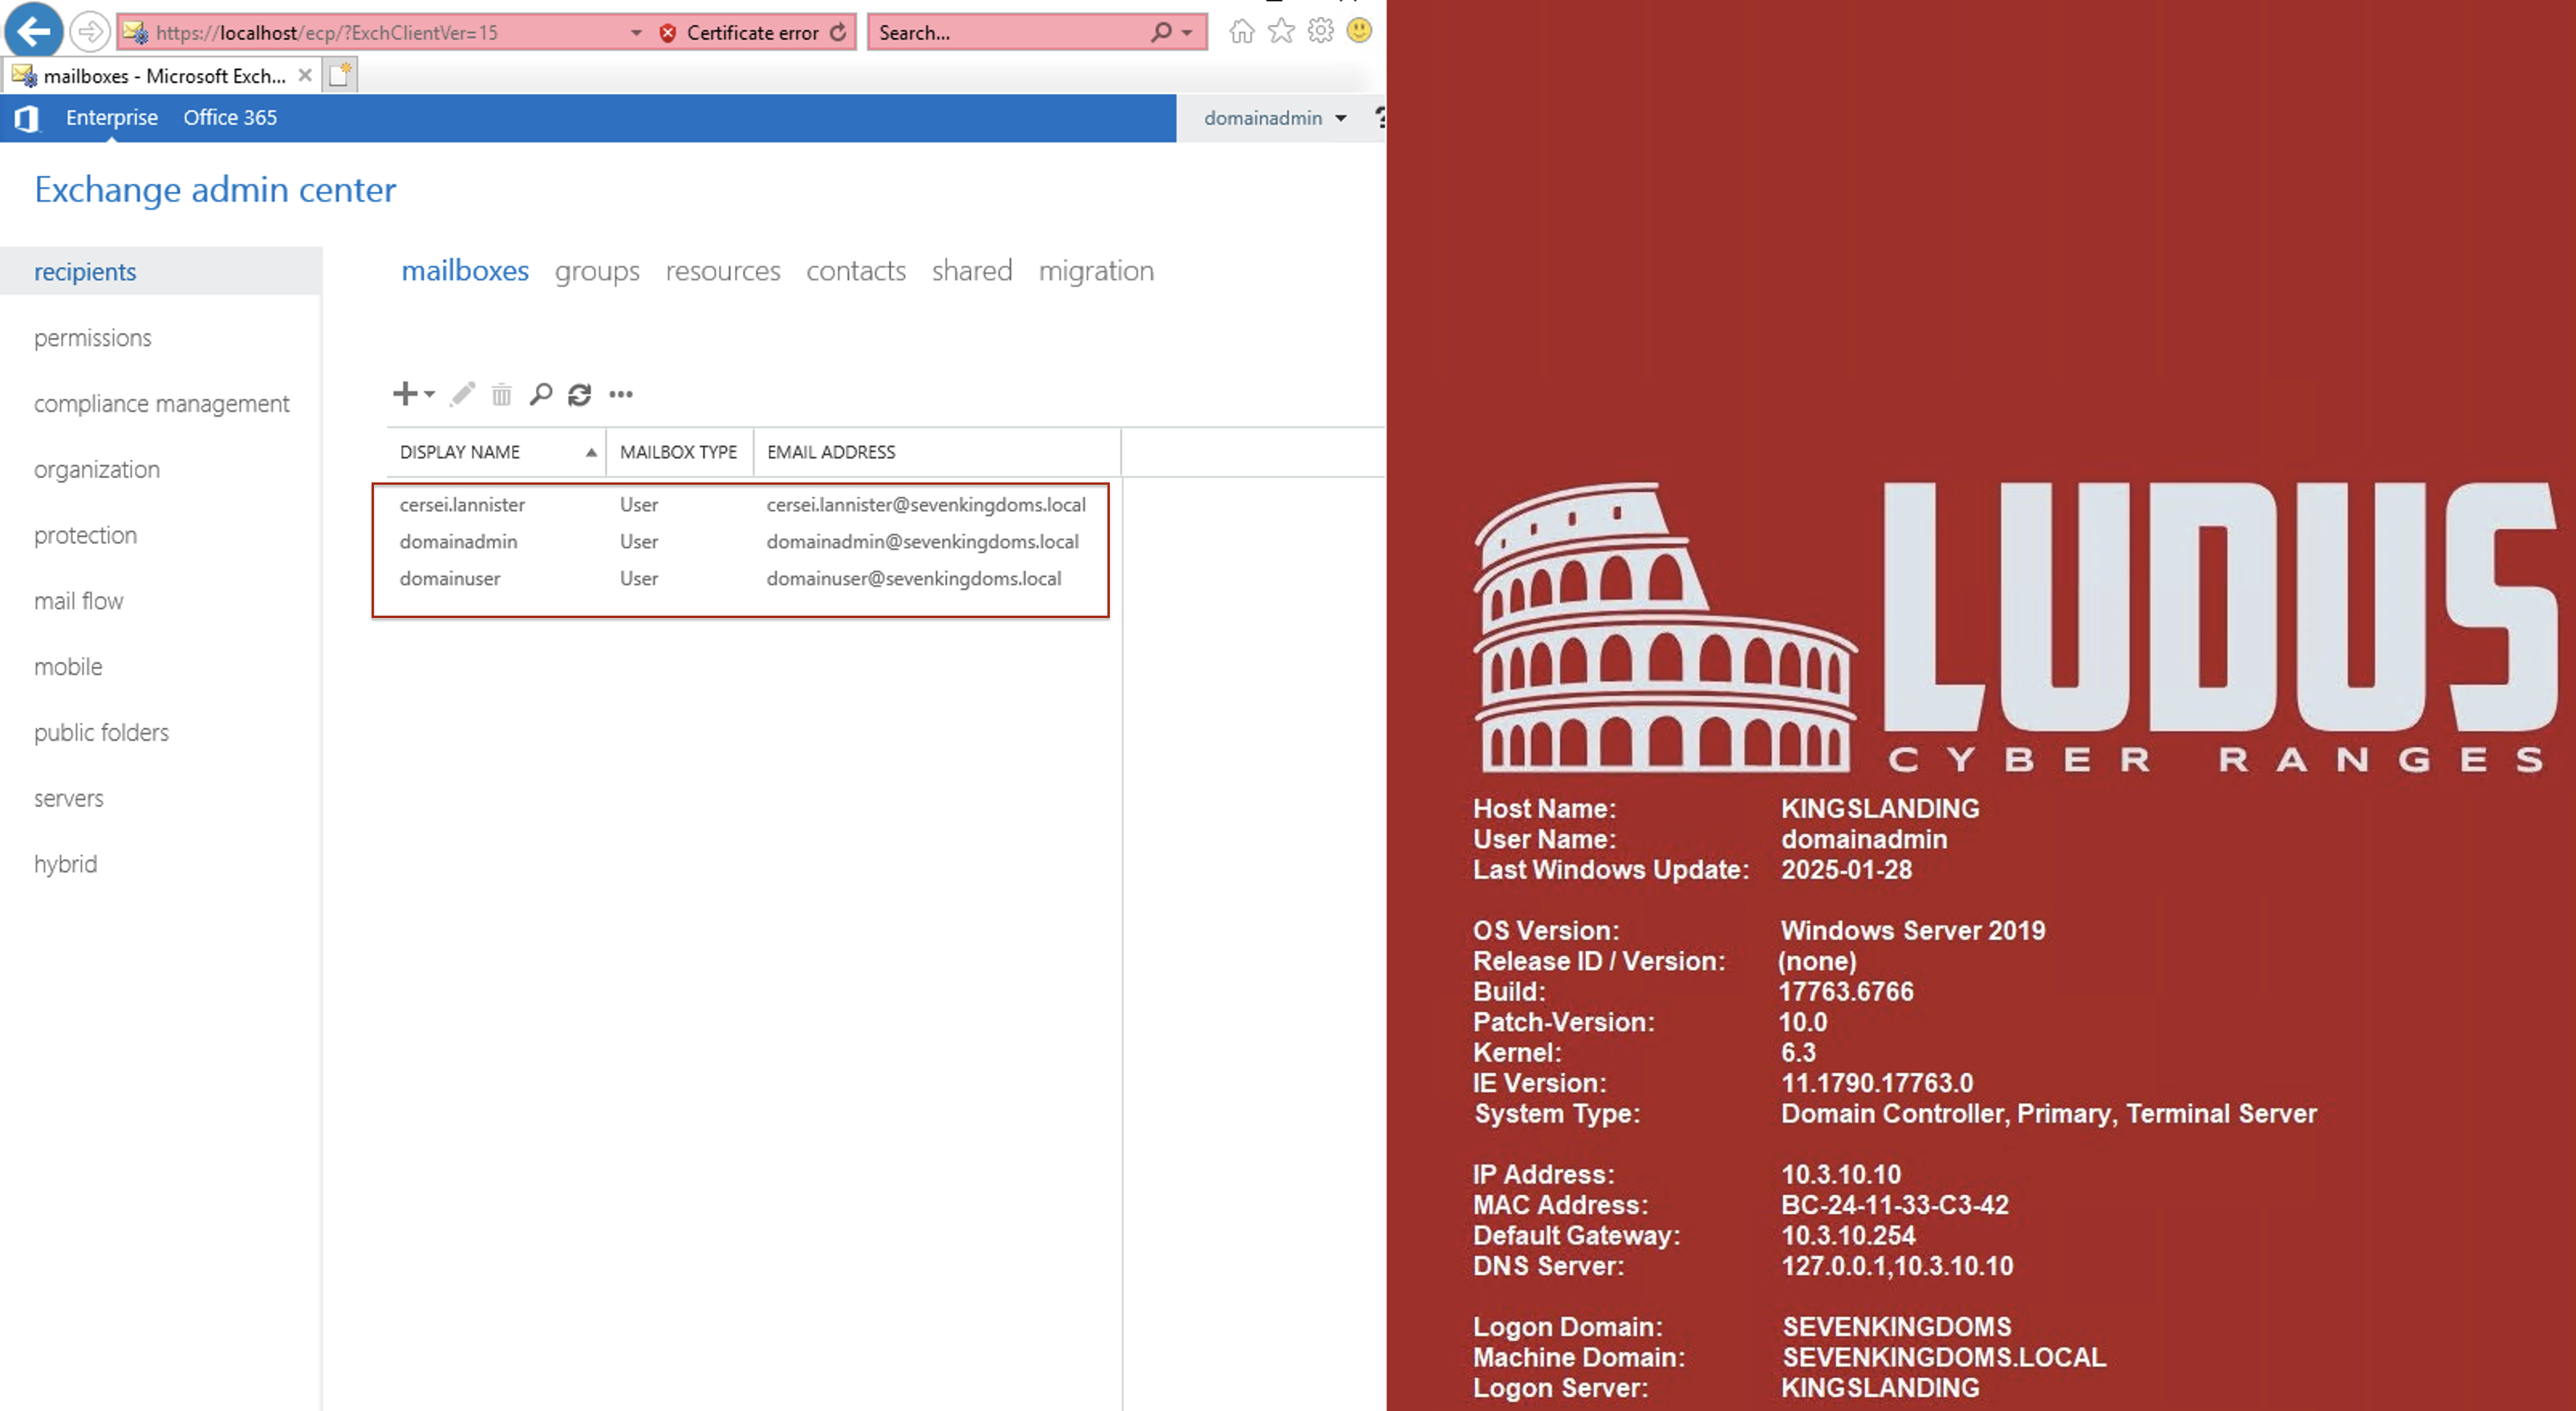
Testing the Exchange
After a successful installation, you can log in to DC01 using the username: domainadmin and the password: password. Once logged in, navigate to the Exchange Center.
- Login to the ProxMox web page:
https://LUDUS-IP:8006![Photo]()
- Click on
DC01and Login toConsole - Go to Exchange Administrative Center
![Photo]() You can add whatever mailboxes of the users
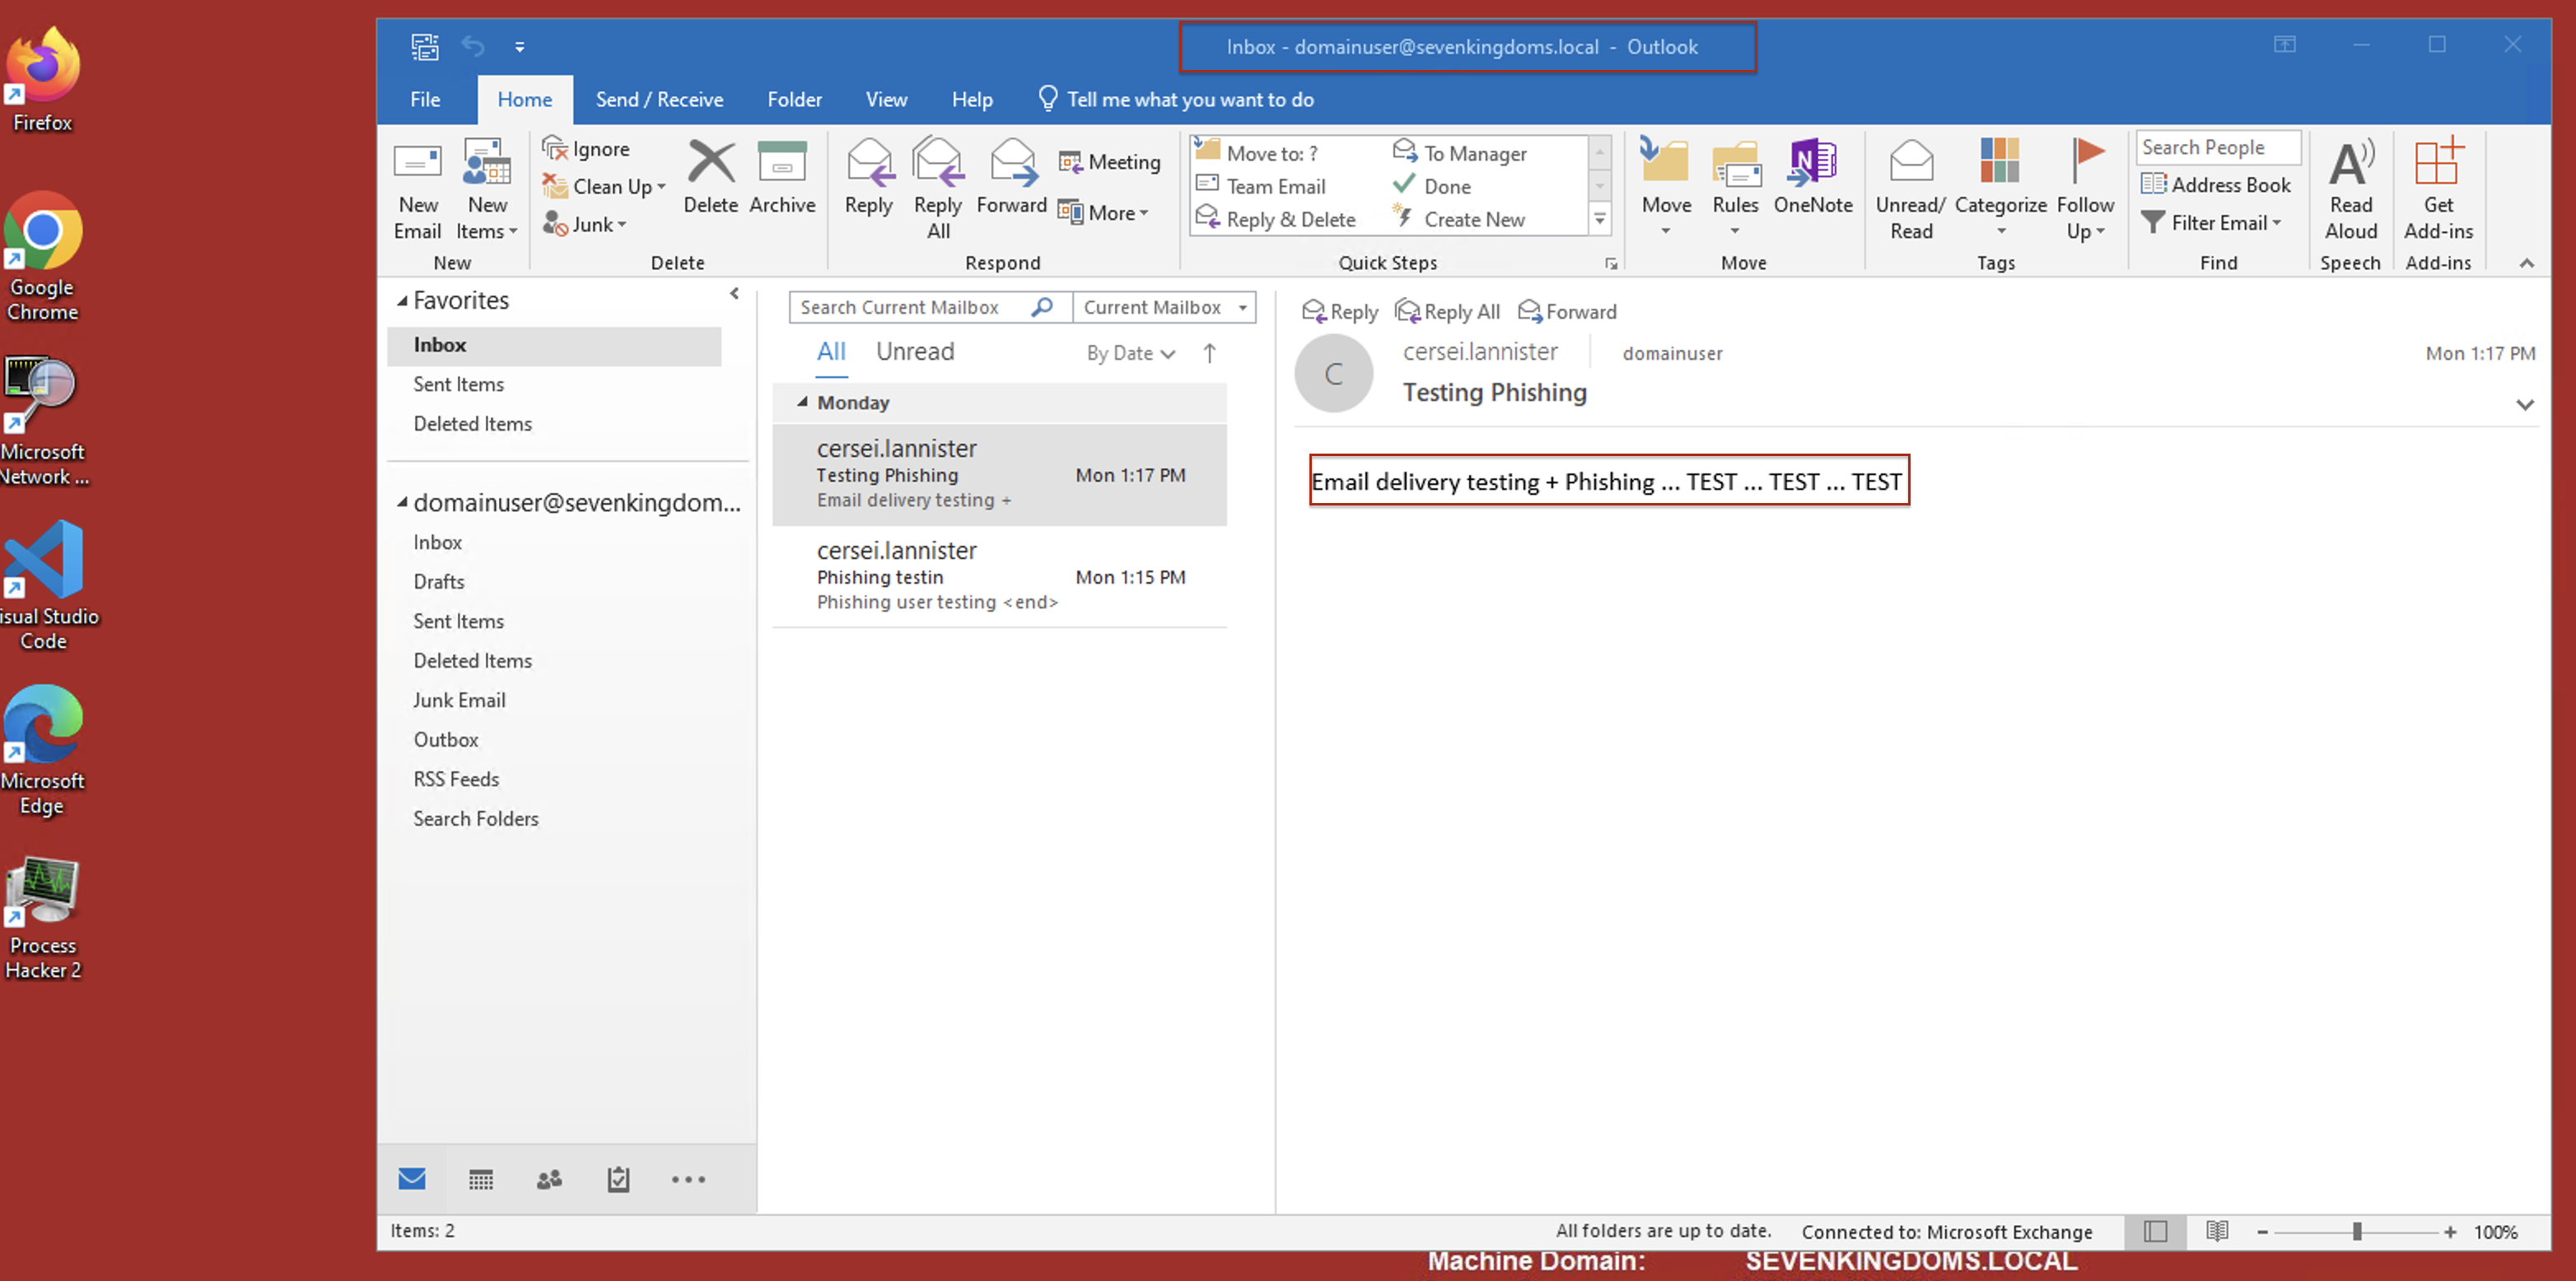
You can add whatever mailboxes of the users - Test the login and sending using the outlook, you can login to
Windows 11and use outlook to login with your user (i.e.domainuser@sevenkingdoms.local)

6. Setup Wazuh XDR/SIEM
The same as previous steps, thanks to aleemladha and his roles of Wazuh. You can find the roles of Wazuh details here:
SERVER https://github.com/aleemladha/wazuh_server_install
AGENT https://github.com/aleemladha/ludus_wazuh_agent
In my case, I decided to install the Wazuh Server on the Kali machine as I did not want to deploy a new Debian or Ubuntu. Feel free to deploy it based on your own preference.
We need to add the role first as we did with the exchange role
1
2
ludus ansible role add aleemladha.wazuh_server_install --user GOAD7f2966
ludus ansible role add aleemladha.ludus_wazuh_agent --user GOAD7f2966
Adding the Wazuh roles in the config:
SERVER on Kali
1
2
3
4
5
6
7
8
9
10
11
12
13
14
15
- vm_name: "{{ range_id }}-kali"
    hostname: "{{ range_id }}-kali"
    template: kali-x64-desktop-template
    vlan: 10
    ip_last_octet: 99
    ram_gb: 4
    cpus: 4
    linux: true
    testing:
      snapshot: false
      block_internet: false
    roles:
      - aleemladha.wazuh_server_install
    role_vars:
      wazuh_admin_password: Wazuh-123
Note: I left the wazuh admin password as default one, you can change it.
Agent on Windows 11
We will install the agent after to test attacks on the windows 11 and make sure the agent is installed successfully.
1
2
3
4
5
6
7
8
9
10
11
12
13
14
15
16
17
18
19
20
21
22
  - vm_name: "{{ range_id }}-GOAD-Win11"
    hostname: "{{ range_id }}-GOAD-Win11"
    template: win11-22h2-x64-enterprise-template
    vlan: 10
    ip_last_octet: 98
    ram_gb: 5
    cpus: 4
    linux: true
    windows:
      install_additional_tools: true
      office_version: 2019
      office_arch: 64bit
    domain:
        fqdn: sevenkingdoms.local
        role: member
    testing:
      snapshot: false
      block_internet: false
    roles:
    - aleemladha.ludus_wazuh_agent
    role_vars:
      ludus_wazuh_siem_server: "10.3.10.99"
After the deployment of the roles you can test going to the Wazuh server: https://10.3.10.99/app/ from one of the machines in the lab.
The credentials should be: admin:Wazuh-123

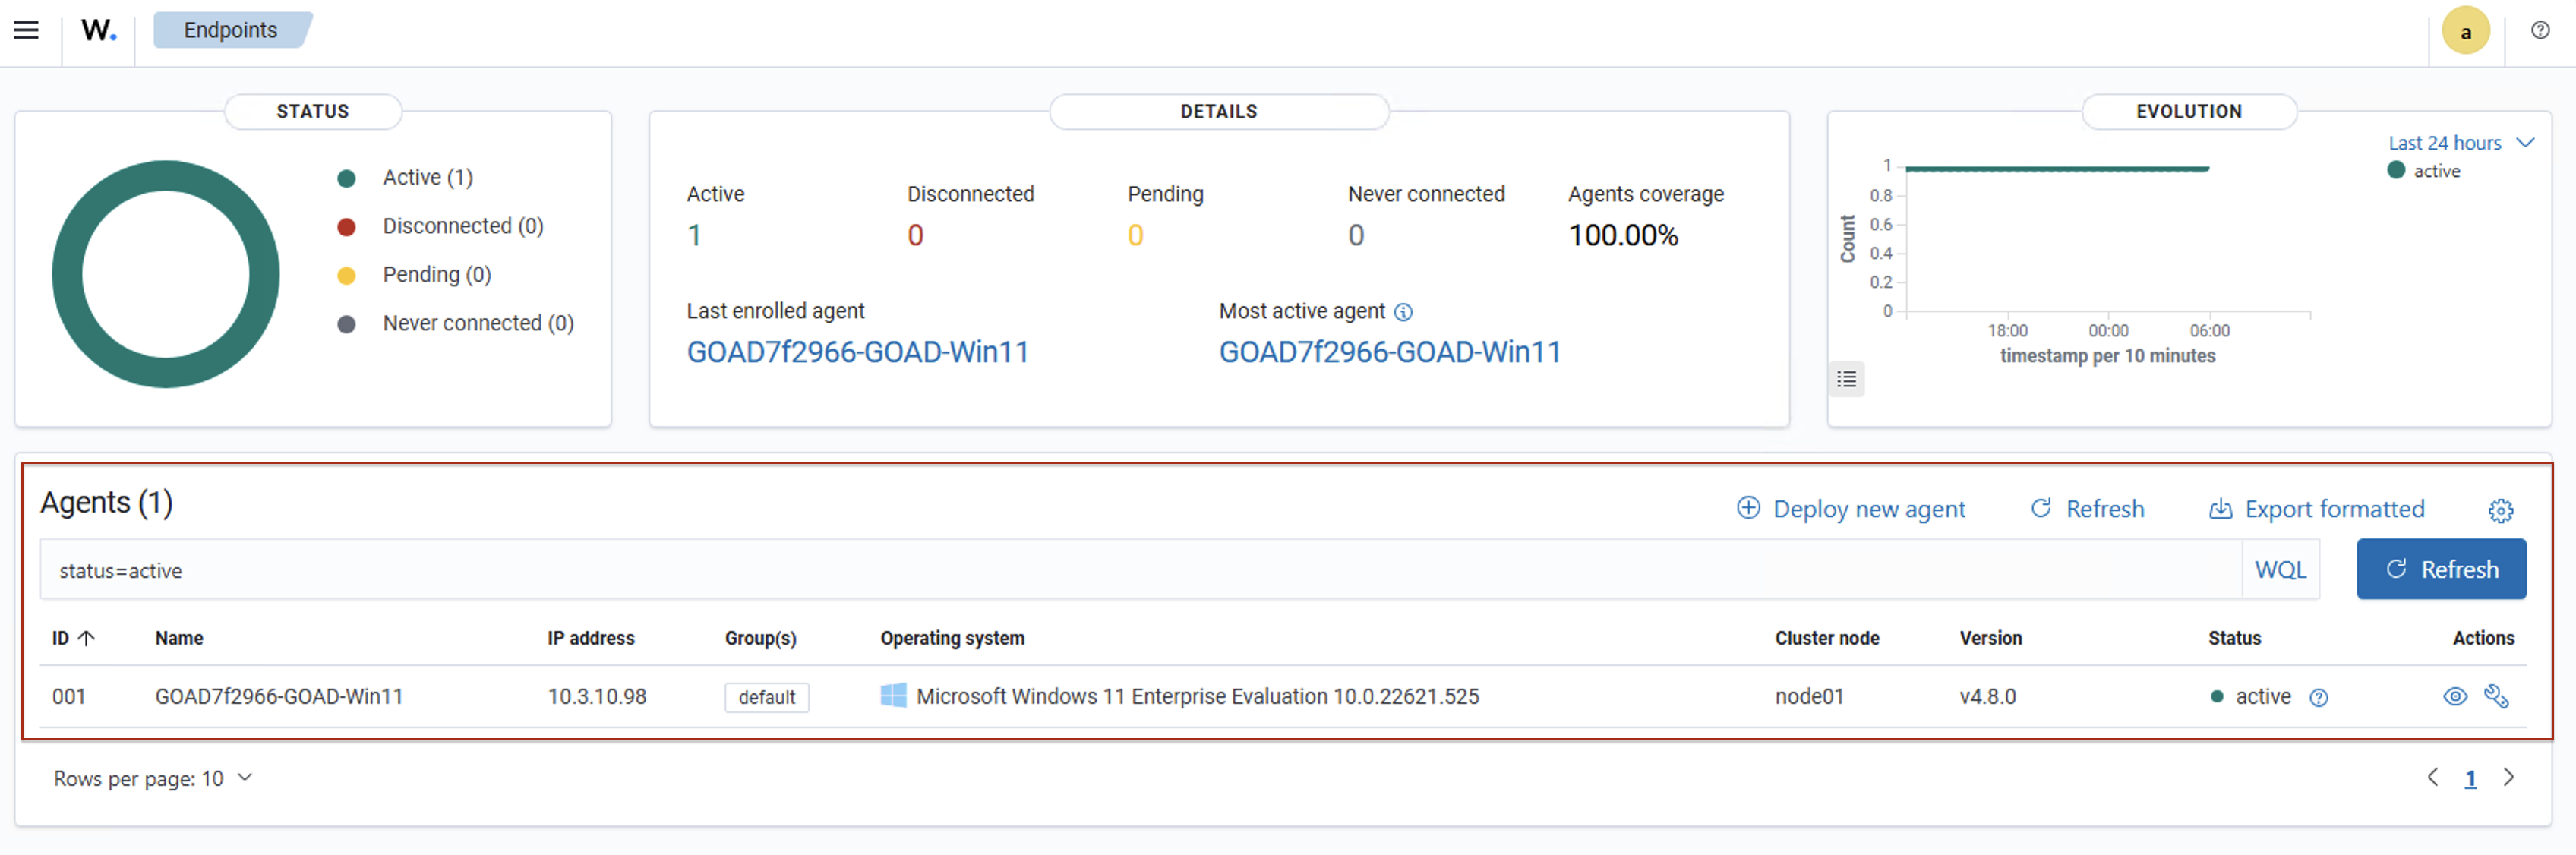
You can also see that the agent of Windows 11 has been successfully installed and connected with the server as shown below:
Connect to your lab from anywhere
One of the best options on Ludus, is that it can connect you with Wireguard to your lab. In this part, I will show you how to setup it easily and configure your router to be able to connect to it from anywhere.
WireGuard
To setup wireguard, you can execute the following command:
1
ludus user wireguard --user GOAD7f2966 --url https://127.0.0.1:8081
The generated configuration file should look like this: 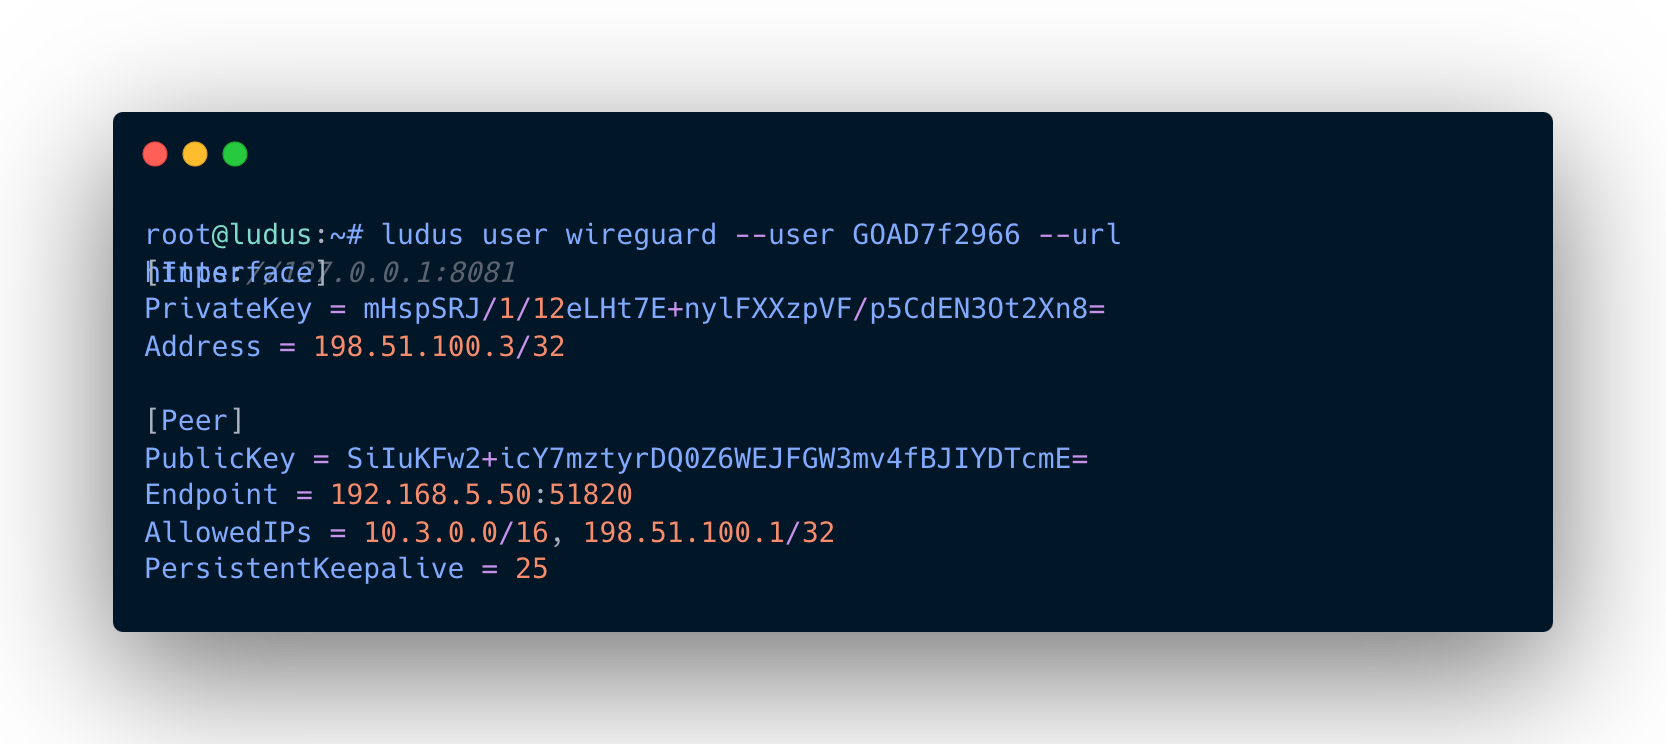 Example of How WireGuard Configuration file looks like
Connect to the lab via Wireguard:
- On Linux
Copy the configuration file homelab.conf to /etc/wireguard/
1
sudo cp homelab.conf /etc/wireguard
Connect to the lab:
1
sudo wg-quick up homelab
to disconnect: sudo wg-quick down homelab
- On Windows / MacOS
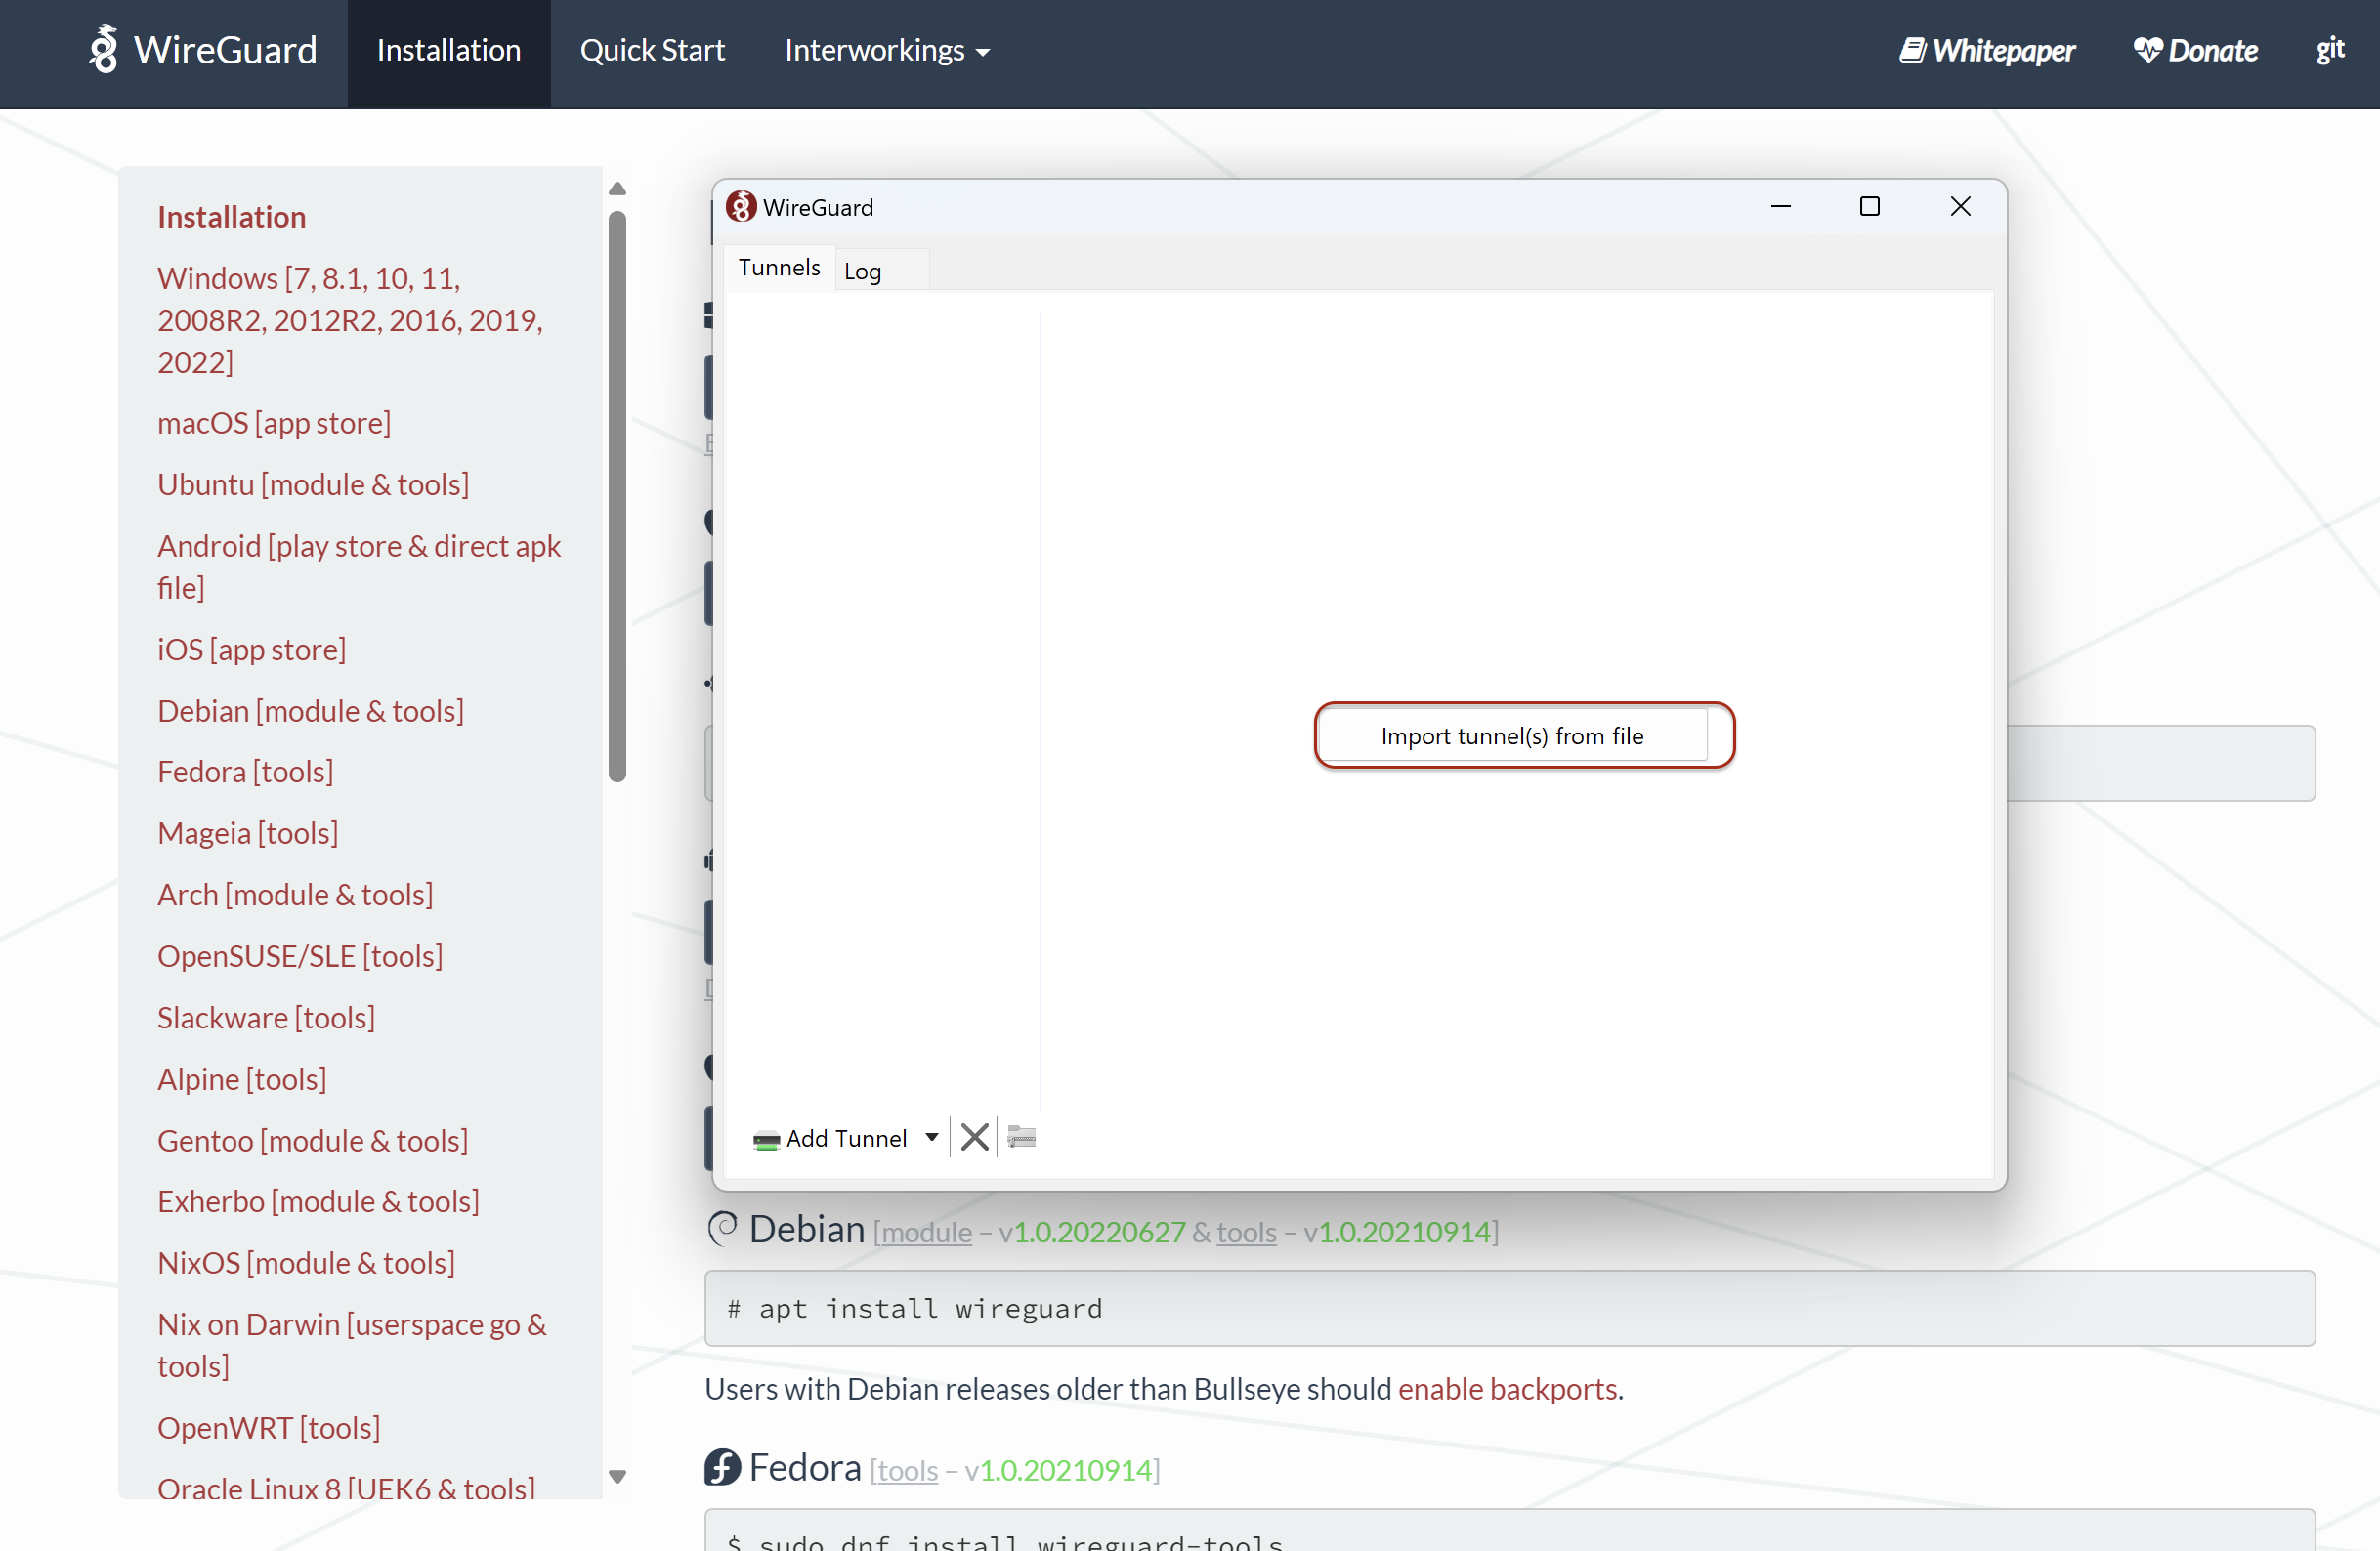
You can download the Wireguard app from here: https://www.wireguard.com/install/
Once Installed, you can click on Import tunnel and select the homelab.conf file.
Connect from Anywhere
if you would like to connect to your lab from anywhere, the easiest way is to enable portforwarding through your router on port 51820
 Example configuration from https://www.tp-link.com/us/user-guides/Archer-MR200_V4/chapter-10-nat-forwarding
You need to modify your Wiregurd configuration file and change the Endpoint with your public IP
It is crucial to implement all necessary security measures—such as network segmentation, IP whitelisting, and other safeguards—before proceeding with this setup.
Now The Setup is ready
Once you connect with the wireguard, you can connect to the windows machine via RDP, or to kali via SSH credentials are:
SEVENKINGDOMS\domainadmin:passwordSEVENKINGDOMS\domainuser:passwordlocaluser:passwordkali:kali
Conclusion
I’ve found Ludus to be an incredibly helpful tool, and while I know there are many other options out there, I wanted to share my experience to make the process easier for others. I hope this guide gives you a clear starting point and helps you avoid some of the hurdles I encountered along the way.
You are probably wondering now whether the hardware I used was sufficient. To be frank, it barely made it. Even with 32GB of RAM, I kept pushing, and from time to time had to shut down one of the servers to keep the rest running without problems. This wasn’t a huge deal for me, but if you’re going to be running more complex setups, or even running multiple environments simultaneously, then this is something you’d want to look at. You may wish to upgrade it to 64GB of RAM if your needs and intended use warrant it.
Overall, I’m really happy with how everything turned out, and I hope this post inspires you to dive into building your own lab. If you have any questions or need help, feel free to reach out—I’d love to hear about your experience!